
If you start seeds in egg cartons it can be a great way to save money on your vegetable garden and reduce plastic waste. Let me show you how!
Why start seeds yourself?
Buying vegetable starts from the greenhouse can add up. If you have a little extra time and some patience, then starting vegetables from seed can be a great way to reduce your garden expenditures. Starting seeds at home can also let you experiment with heritage breeds and different varieties that you might not be able to find at your local greenhouse.
But I’ll be honest, the main reason I start seeds is not frugality. It’s because up here in Zone 3 I’m desperate to do SOMETHING by the time April rolls around. Finally getting my hands in some dirt, even if it’s just potting soil I bought at the grocery store, feels like a balm to my frozen, winter bound soul. If the seeds don’t sprout, then hey, I can always pick up some tomato starts when it comes time to start getting plants in the ground.
When should you start seeds?
It all depends on your local climate, but the general idea is to work backwards from the last frost date. You can use the Farmer’s Almanac calendar here to calculate the dates for your zone. I live in Zone 3 in Western Canada and we can (usually) plan to be frost free by May long weekend. So, working backwards from May long weekend, I plant 4-6 weeks before hand in April. I recommend staying closer to 4 weeks, because if you start too soon the seedlings grow leggy and fragile and take a beating when you try to transfer them outside. Especially if, like me, you are just starting seeds on a living room table in front of a sunny window, and not a specialized set up with grow lights.
Alright, let’s get started!
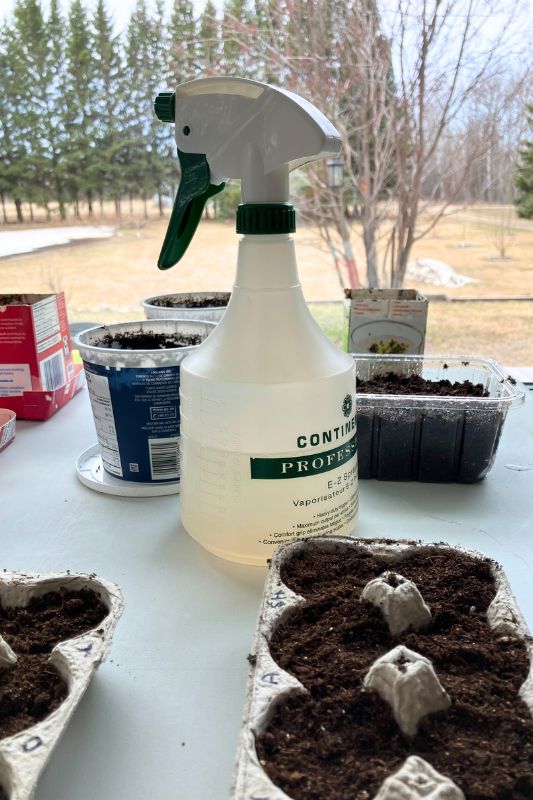
Hydrate your potting mixture
I like to do this step first before preparing the egg cartons. I like to do this in the kitchen where I have easy access to water and countertops that will wipe up easily. Remember, I’m doing this indoors in April when it’s still chilly out where I live; otherwise, I would set up in an outdoor space.
Start by setting a large container like a mixing bowl or a plastic tub in your sink. Fill the container about 2/3 full of the potting mixture. Now turn on the tap for 3-5 seconds and let the water flow into the potting mixture. Knead the mixture with your hands to help the water absorb. Take a deep breath of that loamy, greenhouse smell and dream of spring.
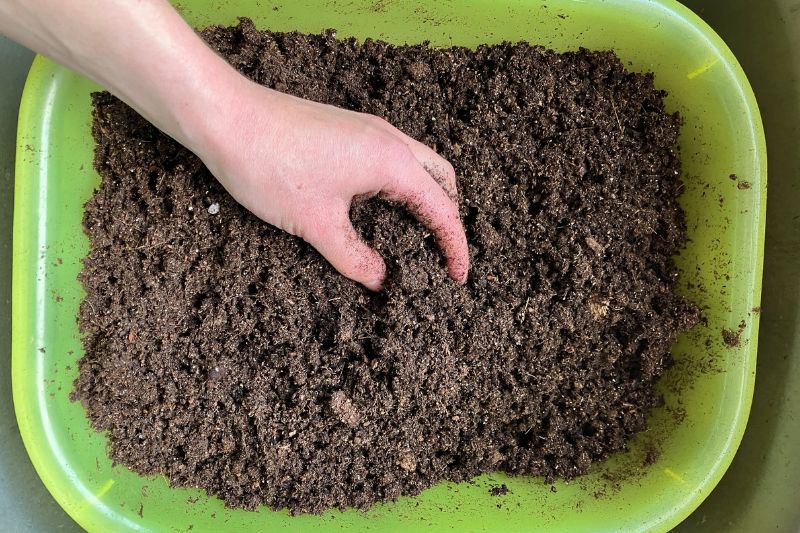
You may need to add a bit more water from the tap until the mixture is damp, but you don’t want to make mud. Once the potting mixture has been hydrated, set it aside. I also like to take a moment here to wipe down my sink and countertops so I don’t feel overwhelmed at the end of this project.
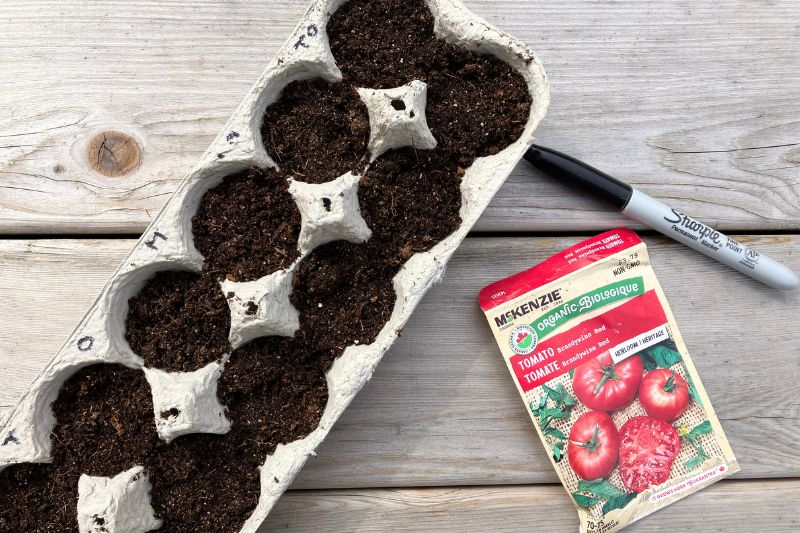
Make the egg carton seed trays
Now you’ll want to gather those egg cartons you’ve been saving all winter. Using a pair of scissors, cut off the lid and the front flap of the egg carton. You should have three pieces. Discard the skinny front flap. You can keep the lid to use as a tray if you like, although it works fine without.
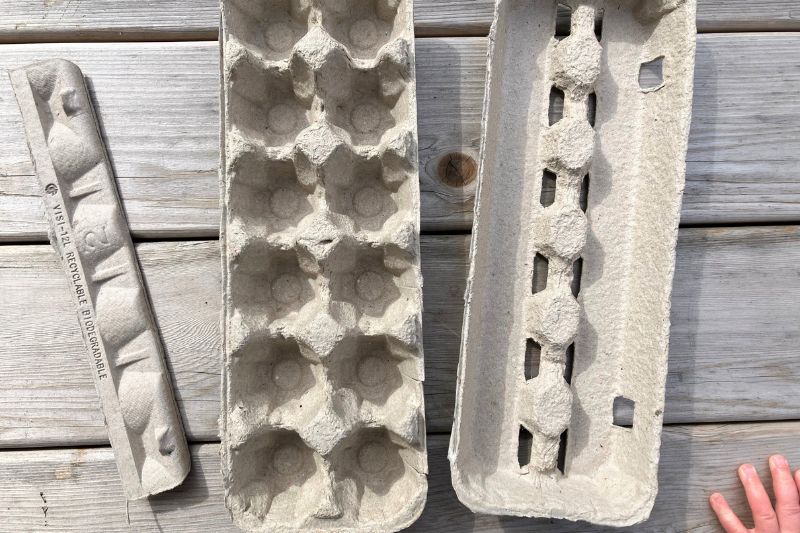
Now take your scissors and make a shallow slit along the side of each egg cell. This is my trick to make it easier to get the seedlings out when you’re transplanting.
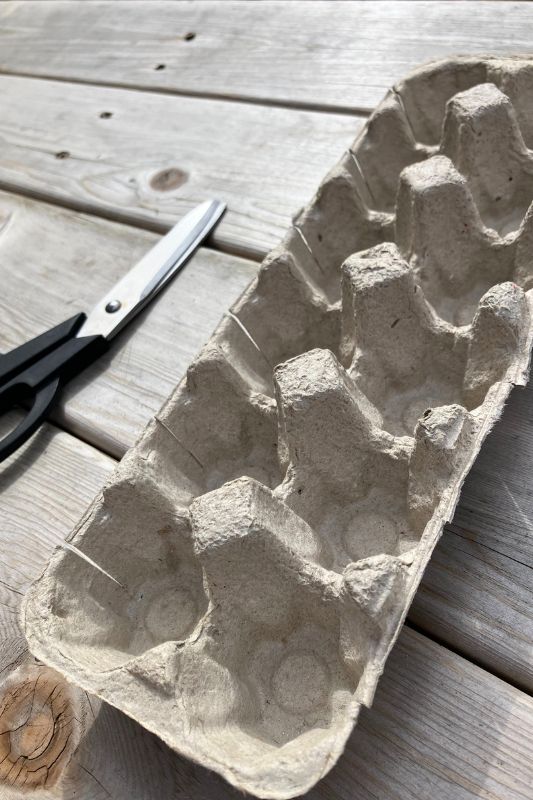
Label the egg carton so you remember what you planted. I’m terrible at this. I always think I’ll remember …. and I don’t. I like to use a Sharpie marker so it shows up and doesn’t fade with repeated waterings.
Plant your seeds
Grab your potting mixture and fill each egg cup. Check the back of your seed packet to see how deep to plant each seed. It’s usually shallower than you think.
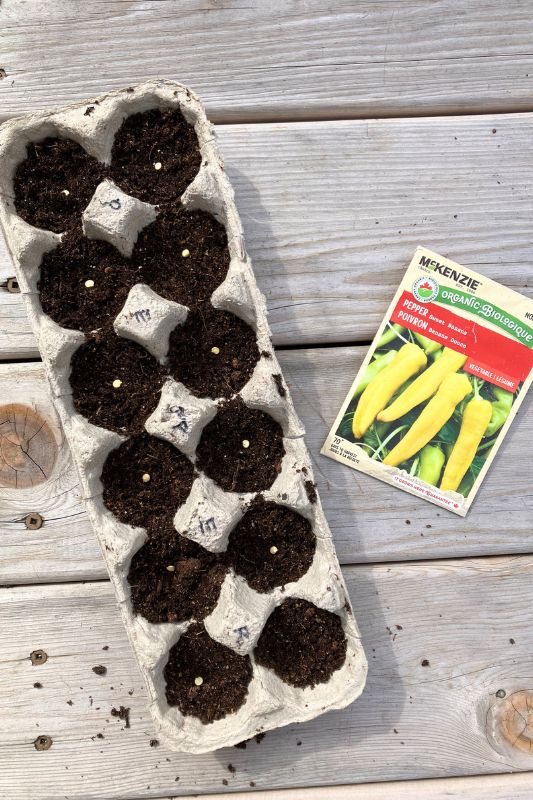
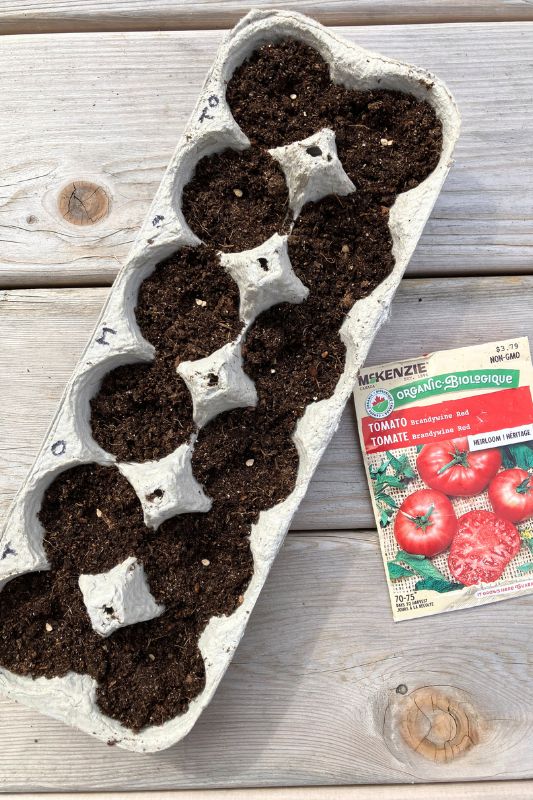
Sprinkle a little more potting mixture on top so that the seeds are buried at the correct depth. And you’ve done it! Seeds are planted.
Water in your seeds
Next, even though the potting mixture was nice and damp, we’ll still want to water in our seeds. A spray bottle works nicely to mist the soil while being gentle on your new baby seeds. The egg carton will get soaked, so keep a cloth nearby to wipe up. Even with twice daily sprayings the carton should hold up for the 2-3 weeks it will be housing your baby seedlings.
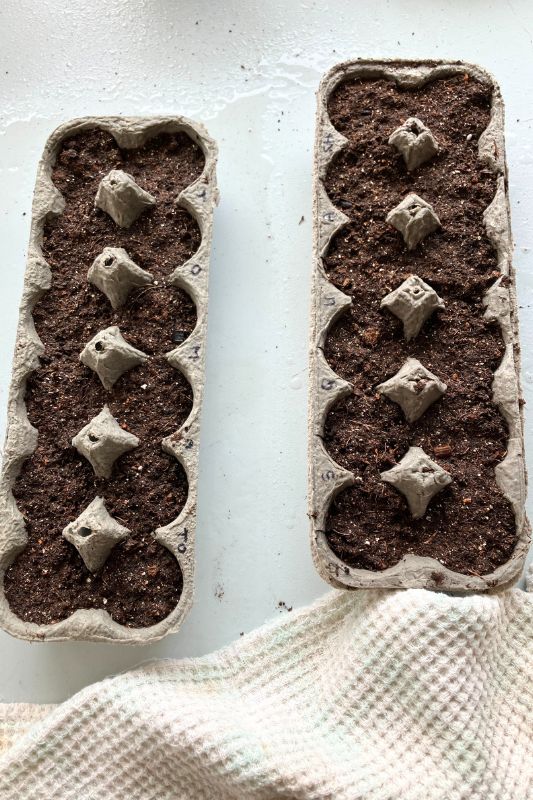
It’s important to note that egg cartons dry out really quickly. While plastic may have other drawbacks, one of its selling points is its ability to retain water. When you’re starting seeds in egg cartons you have to soak well with water every morning and evening. It’s very important not to let the seeds dry out when they’re germinating or you’ll lose your crop. I recommend habit stacking the spritzing with part of your morning and evening routine, or, get your kids involved with the fun spray bottle. You could also cover the trays with plastic wrap, or a damp tea towel.
Wait for sprouts
Now is the time of patiently waiting, which can be hard for little kids (and their moms). Check the back of the seed packet to see what time frame you can expect. It’s very important to not let the seeds dry out when they’re germinating so keep spraying morning and night.
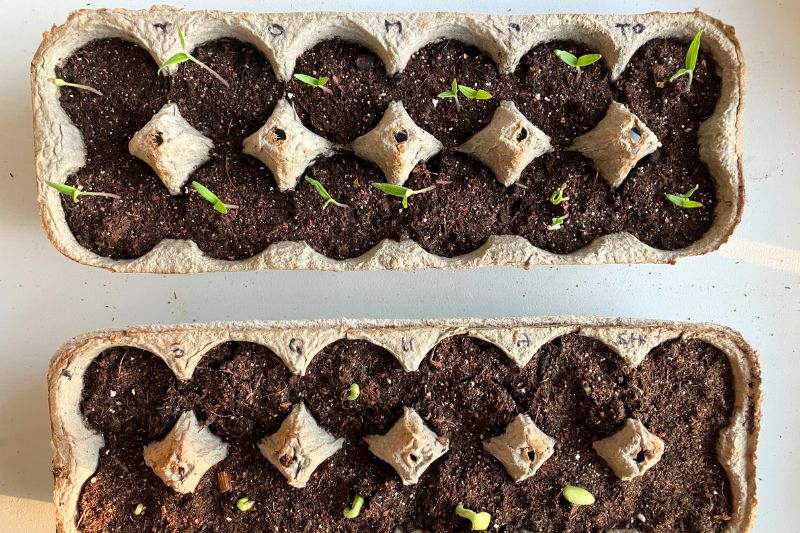
The day when the first seedling pokes its head up is so rewarding!
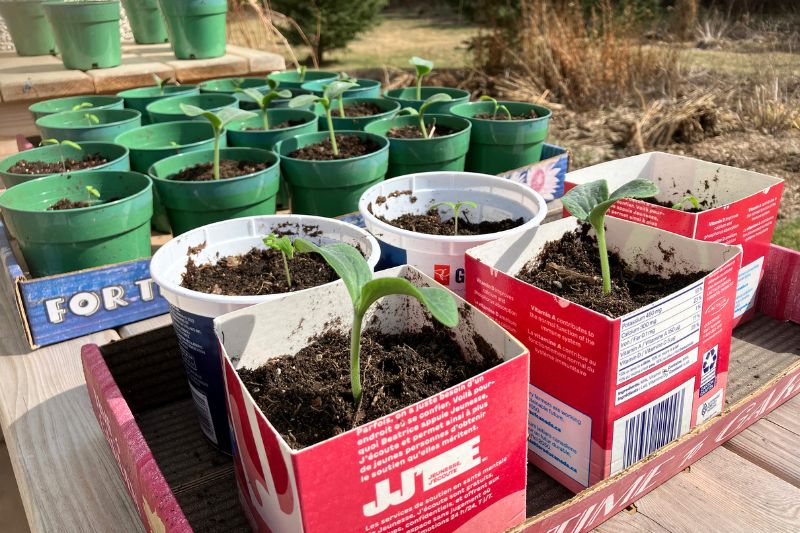
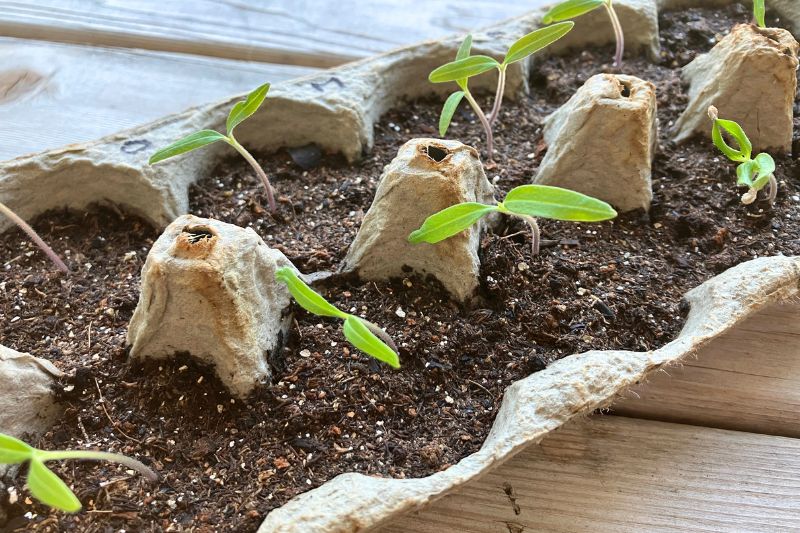
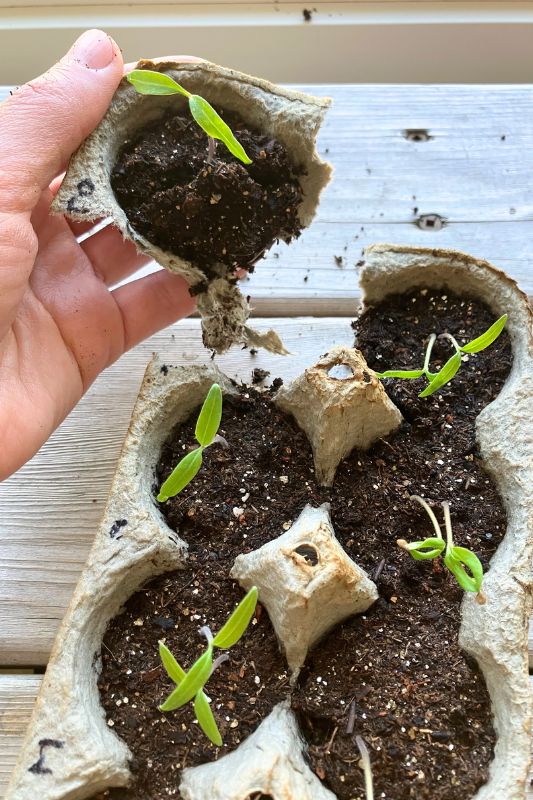
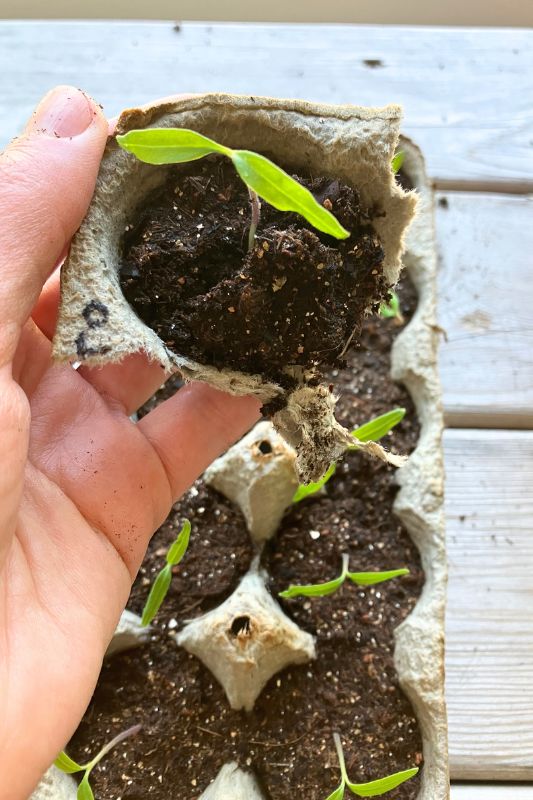
Transplant your seedlings
The little egg cup nests will only work for so long. When your seedings are around the same size as the ones in the photo, it’s time to transplant. You can either plant directly into the garden, or into larger pots that will remain inside. In my climate, I need to do larger pots until it warms up (sigh).
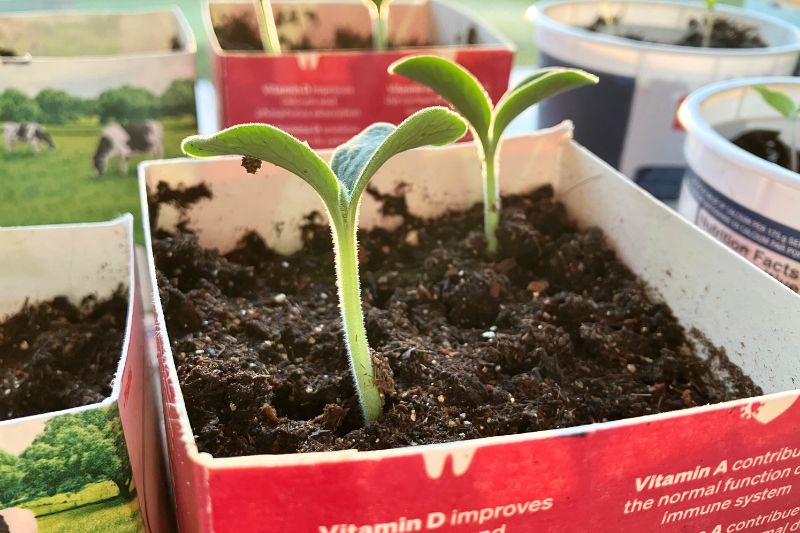
Gather your larger pots, and hydrate more potting mixture, as shown above. If you’d like to see how to make some larger pots from milk cartons, check out my post. Fill the pots around 3/4 full with potting mixture, and make an egg cup sized hole for to transplant the seedling into.
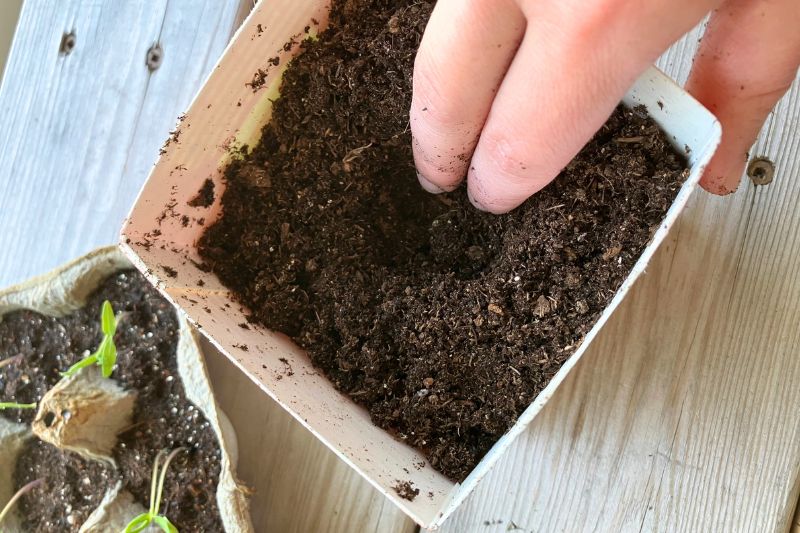
The carton should break apart fairly easily after being damp for so long, but you can also use scissors to help pull each egg cup apart. This is where the slits we cut earlier come in handy. Gently peel the carton away from the seedling, careful not to disturb the roots too much. Sometimes the roots have started digging into the cardboard and you’ll have to carefully tug them out.
Nestle the seedling into the hole in your larger pot and cover with more potting soil. Press down gently to secure the base. Water in your transplants, either with a spray bottle or a watering can. I still use the spray bottle for a few more days until the seedling’s roots are more established and I’m confident that the heavier stream from the watering can won’t knock them down.
I hope this tutorial inspired you to start some seeds using what you have on hand. Let me know what plants you like to start from seed down in the Comments.
How to Start Seeds with Egg Cartons

How to start seeds using cardboard egg cartons. Reduce plastic waste and save money by re-using a common household item.
Materials
- Egg cartons
- Potting soil
- Vegetable seeds
Tools
- Measuring tape or ruler
- Permanent marker
- Scissors
Instructions
Hydrate your potting mixture
- Set a large container like a mixing bowl or a plastic tub in your kitchen sink.
- Fill the container you've chosen 2/3 full of potting mixture.
- Turn on the tap for 5-10 seconds and let the water flow into potting mixture.
- Using your hands, knead the mixture to help the water absorb. You’re feeling for dampness, but you don’t want to make mud.
- Set aside the hydrated potting mixture while you make your egg carton seed trays.
- Now is a good time to give the sink a quick wipe down so you don’t feel overwhelmed at the end of this project.
Egg carton seed trays
- Using a pair of scissors, cut the lid and front flap off the egg carton.
- Discard the front flap. You can keep the lid to use as a tray if you like.
- Using a permanent marker, label the egg carton so you remember what you planted.
- Fill each egg cup with the hydrated potting mixture.
- Read the back of your seed packet to determine how deep to plant each seed (it’s usually shallower than you think).
- Plant the seeds at the correct depth and sprinkle with a little more potting mixture.
- Using a spray bottle, mist the entire carton with water to keep the seeds damp.
- Mist every morning & evening until the seedlings emerge.
- Transplant into larger pots or direct into the garden.
Notes
Egg cartons will dry out much faster than plastic seed trays, so make sure you mist every morning and evening. You can also cover with plastic wrap to help maintain moisture.
Leave a Reply